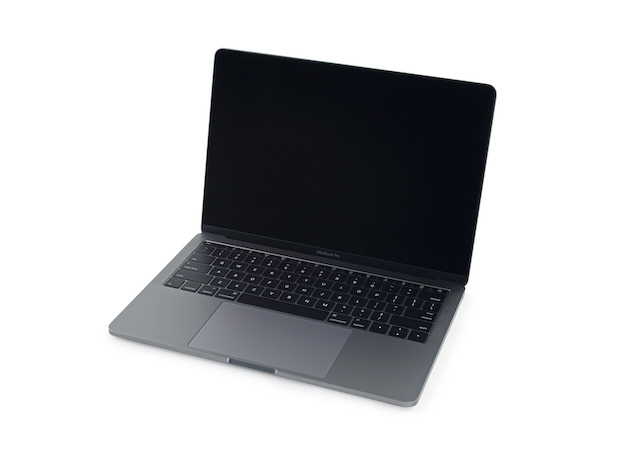
My previous employer had a generous refurbished hardware program where we could purchase used laptops at a greatly discounted rate. I took advantage of this and bought a total of 5 2015 MacBook Airs and the IT folks generously threw in a 13” MacBook Pro with a broken screen, knowing my penchant for resuscitating broken hardware.
The laptop screen would power up, but never displayed anything. While there was a potentially relevant Apple recall for displays, the repair was rejected because of apparent water damage to the machine. I attached a USB C HDMI adapter and that worked with macOS and I could have used the machine as a desktop with an external monitor, but I already had plenty of working laptops and didn’t really need it for that. I decided I would add it to my piecemeal cluster of Linux servers running Kubernetes, I just needed to get a clean installation of Debian on it.
Unfortunately USB C HDMI is not well-supported by the Debian installer. In fact, nothing worked beyond the initial grub installation screen. I initially went down the path of trying to use my USB serial console cable, but gave up after running into the harsh reality that USB serial consoles are very lightly documented (a few references in some grub documentation) and blocked by the USB Braille support in standard Debian installers (I did a build taking this out, still no luck).
Debian Preseeds
Debian preseeds are a technique for automated installations where a preseed file is provided that answers the installer questions. This can be baked into the installation medium or provided through DHCP or a network location. Given that I could get the first screen of the installer, I figured it would be easiest if I used the network location to rapidly iterate over getting the right configuration in place.
I was using the Debian 11 Netboot installer flashed onto a USB thumbdrive with Balena Etcher. On a MacBook Air or MacBook Pro, if you want to boot a USB drive you hold down the Option key while booting and you will eventually see an option titled EFI Boot, which is the Debian installer. This boots into the initial Debian installer menu which is grub providing various installation techniques.
Automated Installation
The Debian Installation Guide’s Contents of the preconfiguration file provides the basics that covered almost everything needed for the installation.
To run the preseed, select Advanced options ... and then select ... Automated install. Press the “E” key to “Edit Selection”. You will be presented with a screen similar to
setparams '... Automated install'

    set background_color=black
    linux   /install.amd/vmlinux auto=true priority=critical vga=788 --- quiet
    initrd  /install.amd/initrd.gz
You need to provide the URL of the preseed file, which was served up by the simple webserver lighttpd on http://10.0.0.2/preseed.cfg. In order to set the hostname and domain of the machine, I had to enter these as well because the preseed did not set them for some reason. The 3rd line is updated to look similar to this:
linux /install.amd/vmlinux auto=true priority=critical vga=788 --- quiet url=http://10.0.0.2/preseed.cfg netcfg/get_hostname=farnsworth netcfg/get_domain=bottlebru.sh
After making these changes, hit F10 to run the installation with your settings. I ran through this a few times with a working MacBook Air so I could verify the preseed settings were correct and iterate until I got everything right. Once it worked, I updated the preseed for the MacBook Pro and ran the installation. About 5 minutes later, I heard the distinctive Apple reboot sound and I was able to SSH into my new Linux server.
2016 MacBook Pro Preseed
Here are the contents of my preseed.cfg, I added comments inline. Some of these may be extraneous, but it worked. A few things to note:
- localised for Australia
- added
mattrayandrootusers with hashed passwords - formatted the entire drive as a single partition
- the MacBook Pro used
/dev/nvme0n1as the disk instead of/dev/sdaon the older MacBook Airs - there is an apt-cacher-ng proxy cache running at http://10.0.0.4:3142
- the additional packages
curl emacs-nox htop openssh-server rsync sudo usbutils zshare installed - Remote root SSH is enabled so I can login to the machine once it installs
#_preseed_V1

### Network/Hostname
d-i netcfg/choose_interface select auto
d-i netcfg/get_hostname string farnsworth
d-i netcfg/get_domain string bottlebru.sh
d-i netcfg/hostname string farnsworth.bottlebru.sh
# the above settings never seemed to work, but adding
# netcfg/get_hostname=farnsworth netcfg/get_domain=bottlebru.sh
# to the grub CLI worked

### Localization
# some of this is probably overkill
d-i debian-installer/country string AU
d-i debian-installer/language string en_AU:en
d-i debian-installer/locale select en_AU.UTF-8
d-i keyboard-configuration/xkb-keymap select us
d-i keymap select us
d-i time/zone string Australia/Sydney
tzdata tzdata/Areas select Australia
tzdata tzdata/Zones/Australia select Sydney
tzsetup-udeb time/zone select Australia/Sydney

### Clock/NTP
d-i clock-setup/utc boolean true
d-i clock-setup/ntp boolean true

### Users
d-i passwd/user-fullname string Matt Ray
d-i passwd/username string mattray
# encrypted using a crypt(3) hash from whois package `mkpasswd -m sha-512`
d-i passwd/root-password-crypted password $6$w.JmcUilXD1bk/$39EE73ghigxMpHaip03dNKq0ZuzDYYD/gq2F2GAEQJxbGRlL0zidd3u5RrTBsokQ8Kid9x89bOLdzjcMfbck3/
d-i passwd/user-password-crypted password $6$Z3rruwk5Et$zwi8MxWYY5E4/l3JCBEG60VJHNKHTUhcbTAFPZHNQS7VR.HAJFlmMLxXx.Ld0SpM8HoXzY.T9XlC5R6nbmyAY1

### Partitioning
d-i partman-auto/choose_recipe select atomic
d-i partman-auto/confirm boolean true
d-i partman-auto/disk string /dev/nvme0n1
d-i partman-auto/method string regular
d-i partman-partitioning/confirm_write_new_label boolean true
d-i partman/choose_partition select finish
d-i partman/confirm boolean true
d-i partman/confirm_nooverwrite boolean true

### Package Sources
choose-mirror-bin mirror/http/countries select AU
choose-mirror-bin mirror/http/proxy string http://10.0.0.4:3142
d-i mirror/https/directory string /debian/
d-i mirror/https/hostname string deb.debian.org
d-i mirror/https/mirror select deb.debian.org

### System installation
d-i base-installer/install-recommends boolean false
d-i base-installer/kernel/override-image string linux-server
d-i debian-installer/splash boolean false
d-i pkgsel/include string curl emacs-nox htop openssh-server rsync sudo usbutils zsh
d-i pkgsel/install-language-support boolean false
d-i pkgsel/update-policy select none
d-i pkgsel/upgrade select full-upgrade
popularity-contest popularity-contest/participate boolean false
tasksel tasksel/first multiselect ssh-server
# the openssh settings never seemed to take
d-i preseed/late_command string \
 in-target sh -c 'sed -i "s/^#PermitRootLogin.*\$/PermitRootLogin yes/g" /etc/ssh/sshd_config';

### Finish and reboot
d-i grub-installer/only_debian boolean true
d-i grub-installer/bootdev  string /dev/nvme0n1
d-i finish-install/keep-consoles boolean false
d-i finish-install/reboot_in_progress note
USB C Ethernet Adapters
I have a USB C gigabit ethernet adapter that utilizes the Realtek RTL8153 chipset, but that isn’t supported in the Linux 5.10 kernel shipped with Debian Bullseye/Stable. For my installation, I used a known-working 100 megabit ethernet adapter with a USB A-C adapter. After the installation, I had to use the Debian Backports linux-image-amd64.
apt install linux-image-amd64/bullseye-backports
Farnsworth
With Debian Stable installed and the Backport kernel, I now have a new fastest machine in my cluster: (“farnsworth”).